
Windows Update error 0xc1900101 means the update installation started but was rolled back before completing. Windows detected an incompatible driver during the upgrade process and automatically reversed the installation to prevent a non-bootable system.
According to Microsoft’s official documentation, 0xc1900101 is specifically a rollback error that occurs during major feature updates — such as upgrading from Windows 10 to Windows 11 or installing a major version update. The most common secondary codes are 0x20017 (driver failure in safe OS phase) and 0x4000D (migration failure).
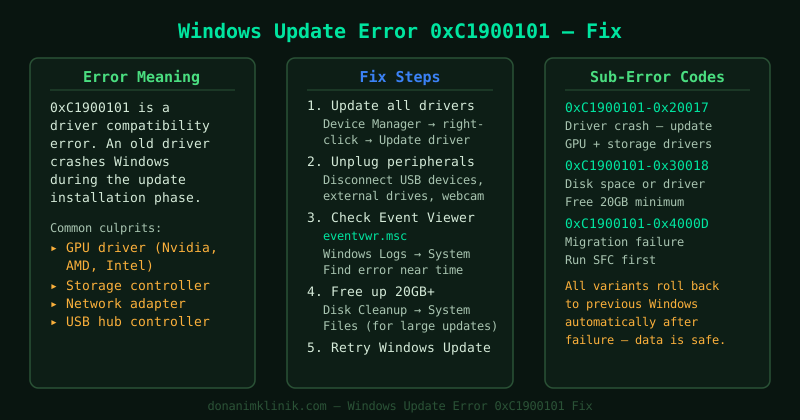
What causes Windows Update error 0xc1900101
The 0xc1900101 error is always caused by a driver or hardware compatibility problem during a feature update:
- Incompatible device driver — a driver installed on the system does not support the target Windows version, causing setup to fail during the driver migration phase
- External USB hardware — a connected peripheral has a driver that conflicts with the new Windows version
- Corrupted driver files — an existing driver is damaged and causes setup to crash during the installation phase
- Antivirus or security software — some security tools inject drivers that block the Windows upgrade process
The secondary error code (0x20017, 0x4000D, etc.) indicates at which phase of the upgrade the failure occurred, but the fix is the same: identify and remove the incompatible driver.
How to fix Windows Update error 0xc1900101
Step 1 — Run SetupDiag to identify the failing driver
SetupDiag reads the Windows Setup log files and pinpoints exactly which driver caused the rollback.
- Download SetupDiag from Microsoft’s official download page
- Save it to a folder such as
C:\SetupDiag\ - Open Command Prompt as administrator, navigate to the folder:
cd C:\SetupDiag - Run:
SetupDiag.exe /Output:results.log - Open
results.login Notepad - Look for lines mentioning a specific .sys or .inf file — this is the incompatible driver
Note the driver name and the associated device. Use this in the next step.
Step 2 — Update or uninstall the incompatible driver
- Right-click Start and select Device Manager
- Find the device associated with the driver identified by SetupDiag
- Right-click the device and select Update driver → Search automatically for drivers
- If Windows finds an updated driver, install it and restart
- If no updated driver is available, right-click the device and select Uninstall device
- Check Delete the driver software for this device and confirm
- Restart the computer and run Windows Update again
After removing or updating the driver, Windows can complete the feature update without rolling back.
Step 3 — Disconnect all non-essential external hardware
Some connected USB devices have drivers that are incompatible with the target Windows version. Disconnecting them removes those drivers from the upgrade process.
Before running Windows Update:
- Unplug all USB devices except the keyboard and mouse:
- USB flash drives and external hard drives
- Card readers and SD card adapters
- USB webcams and microphones
- Drawing tablets (Wacom, Huion, etc.)
- USB hubs
- Also disconnect any Thunderbolt or DisplayPort adapters
- Run Windows Update with only the essential devices connected
- After the update completes, reconnect devices one at a time and check for driver issues
Step 4 — Run the Windows Update Troubleshooter
- Go to Settings → System → Troubleshoot → Other troubleshooters
- Click Run next to Windows Update
- Allow the troubleshooter to complete and apply any fixes
- Restart the computer and attempt the update again
Step 5 — Use the Media Creation Tool
If Windows Update repeatedly fails with 0xc1900101, bypass it entirely by using the Media Creation Tool, which performs the upgrade using a freshly downloaded Windows image.
- Download the Media Creation Tool from microsoft.com/software-download (for Windows 11) or the Windows 10 equivalent
- Run the tool and select Upgrade this PC now
- Follow the prompts — the tool downloads a complete Windows installation image and performs the upgrade
- The Media Creation Tool skips some driver validation checks that cause 0xc1900101 in Windows Update
How to verify the fix
- After the update completes without rolling back, go to Settings → System → About
- Confirm the Windows specification shows the correct version and build number
- Check Settings → Windows Update → Update history — the feature update should show Successfully installed
Frequently asked questions
The update keeps rolling back even after removing the driver SetupDiag identified. Run SetupDiag again after removing the first driver — the log may now show a different driver as the failure point. Some systems have multiple incompatible drivers that must each be addressed individually.
0xc1900101 0x20017 specifically — what does 0x20017 mean? The 0x20017 sub-code indicates the failure occurred in the Safe OS phase — early in the installation when Windows is loading drivers for the new environment. This specifically points to a kernel-mode driver conflict. SetupDiag will identify the exact driver.
I cannot find SetupDiag or it shows no results. SetupDiag requires the Windows Setup log files to be present. If the system was restarted multiple times after the failed update, the logs may have been cleared. In this case, proceed directly to Step 3 (disconnect external hardware) and Step 5 (Media Creation Tool).