
Unable to update Windows 11 describes a situation where Windows Update cannot check for updates, shows no available updates when updates are known to exist, or displays an error on the Windows Update page itself — as opposed to an update that downloads but fails to install. According to Microsoft’s official documentation, the most commonly missed cause is update delivery paused by the user, followed by stopped Windows Update services and metered connection settings blocking downloads.
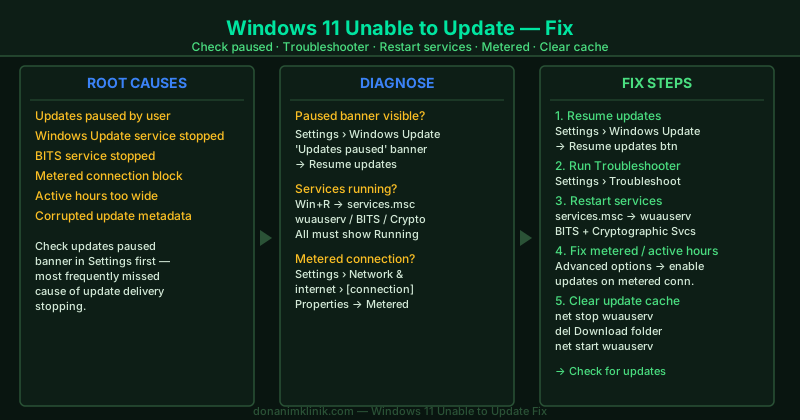
What causes Windows 11 to be unable to update
When Windows Update cannot deliver updates at all — not downloading, not showing available updates — the cause is almost always a configuration or service issue rather than a component corruption:
- Updates manually paused — the most frequently missed cause; visible in Settings > Windows Update
- Windows Update service stopped — the core service that manages update scanning and delivery is not running
- BITS service stopped — Background Intelligent Transfer Service handles background downloads; if stopped, nothing downloads
- Metered connection blocking downloads — Windows does not download updates automatically on metered connections by default
- Active hours covering all PC usage time — Windows won’t install updates if active hours span when you actually use the PC
- Corrupted SoftwareDistribution folder — corrupted metadata prevents new update scans from completing
How to fix Windows 11 unable to update
Step 1 — Check if updates are paused
This is the fastest and most frequently overlooked fix.
- Go to Settings → Windows Update
- Look for a banner that reads “Updates paused” or “Updates are paused until [date]”
- If present, click Resume updates
- Click Check for updates immediately after
Updates are paused automatically if you previously set a pause period in Settings → Windows Update → Advanced options → Pause updates. After resuming, Windows typically begins scanning within 30 seconds.
Step 2 — Run Windows Update Troubleshooter
The troubleshooter addresses service-level problems that prevent update scanning from completing.
- Go to Settings → System → Troubleshoot → Other troubleshooters
- Click Run next to Windows Update
- Apply any suggested fixes
- Restart your PC when the troubleshooter completes
- Go to Settings → Windows Update → Check for updates
The troubleshooter checks the wuauserv service, BITS, Cryptographic Services, and update server connectivity in one automated pass.
Step 3 — Restart the Windows Update service and related services
If the troubleshooter does not find an issue but updates still fail to scan, restart the services manually.
- Press Win + R, type
services.msc, press Enter - Scroll to Windows Update — right-click → Restart (or Start if it shows Stopped)
- Scroll to Background Intelligent Transfer Service (BITS) — right-click → Restart
- Scroll to Cryptographic Services — right-click → Restart
All three must show Running status. After restarting them:
- Go to Settings → Windows Update → Check for updates
- Windows should begin scanning within 15–30 seconds
Step 4 — Check metered connection and active hours settings
Two settings in Windows Update can block update delivery without showing an error:
Metered connection:
- Go to Settings → Windows Update → Advanced options
- Find Download updates over metered connections and turn it On if you are on a hotspot or limited data plan
Active hours:
- Go to Settings → Windows Update → Advanced options → Active hours
- If your active hours span most of the day, Windows will not install updates during those hours
- Set a narrower window (for example, 8 AM – 6 PM) that reflects your actual PC usage
- Or select Automatically to let Windows determine the best window
After adjusting these settings, click Check for updates.
Step 5 — Clear the SoftwareDistribution folder
Corrupted metadata in the SoftwareDistribution folder can prevent update scans from completing — Windows attempts to read the existing cache, encounters corrupt entries, and fails silently.
- Right-click Start → Terminal (Admin) or Command Prompt (Admin)
- Stop update services:
net stop wuauserv
net stop bits- Open File Explorer → navigate to
C:\Windows\SoftwareDistribution\Download - Select all contents (Ctrl+A) → delete — leave the Download folder in place
- Return to Command Prompt and restart:
net start wuauserv
net start bits- Go to Settings → Windows Update → Check for updates
Windows recreates the download cache clean. The first scan after this may take 2–5 minutes as it rebuilds update metadata from Microsoft’s servers.
How to verify the fix
- Go to Settings → Windows Update — the page should show “Checking for updates…” when you click the button, then list available updates or show “You’re up to date”
- If updates appear, let them download and install
- After installation, go to Settings → Windows Update → Update history and confirm updates show Successfully installed
If Windows Update still cannot check for updates after completing all five steps, consult the Windows 11 Upgrade Errors hub or contact Microsoft Support at support.microsoft.com.