
Windows 11 update keeps failing means the same update — or every update — downloads successfully but rolls back after each installation attempt, repeating the failure cycle indefinitely. According to Microsoft’s official documentation, recurring update failures are caused by two sources: a corrupted SoftwareDistribution download cache that persists across retries, and a corrupted catroot2 cryptographic store that causes every installation to fail verification.
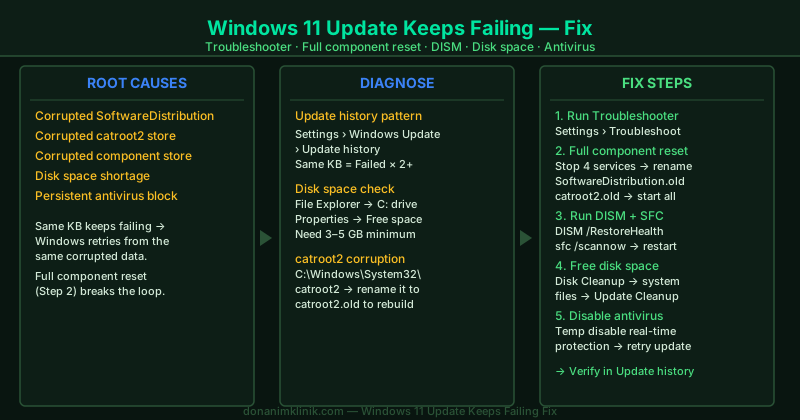
Why Windows 11 updates keep failing
A one-time update failure can have many causes. When the same update fails on every attempt, the cause is almost always persistent corruption — Windows retries using the same broken data:
- Corrupted SoftwareDistribution folder — downloaded update packages are corrupted, and Windows keeps retrying from the same corrupted files
- Corrupted catroot2 store — Windows cannot verify the cryptographic signatures of update packages, causing every installation to fail at verification
- Corrupted Windows component store — the WinSxS directory has damaged entries that block every update from being applied
- Insufficient disk space — space runs out mid-installation on every attempt, causing the same rollback each time
- Persistent antivirus interference — security software blocks file writes during installation on every update attempt
How to fix Windows 11 update keeps failing
Step 1 — Run Windows Update Troubleshooter
Even in recurring failure cases, the troubleshooter occasionally catches simple service configuration issues that cause the loop.
- Go to Settings → System → Troubleshoot → Other troubleshooters
- Click Run next to Windows Update
- Apply any suggested fixes and restart your PC
- Go to Settings → Windows Update → Check for updates and watch whether the same update fails again
If the failure recurs, the troubleshooter has ruled out simple service problems and the full component reset in Step 2 is required.
Step 2 — Reset Windows Update components completely
This is the definitive fix for recurring update failures. Renaming SoftwareDistribution and catroot2 forces Windows to create completely fresh versions of both — eliminating all persistent corrupted data.
Open Command Prompt as administrator and run these commands in this exact order:
Stop all update services:
net stop wuauserv
net stop cryptsvc
net stop bits
net stop msiserver
Rename the corrupted folders:
ren C:\Windows\SoftwareDistribution SoftwareDistribution.old
ren C:\Windows\System32\catroot2 catroot2.old
Restart all update services:
net start wuauserv
net start cryptsvc
net start bits
net start msiserver
Restart your PC, then go to Settings → Windows Update → Check for updates.
Windows creates a new SoftwareDistribution folder and a new catroot2 folder automatically when the services restart. You can delete the .old folders later after confirming updates work.
Step 3 — Run DISM to repair the Windows component store
If the update continues to fail after the component reset, the Windows Component Store (C:\Windows\WinSxS) — the resource that update packages modify — has corrupted entries.
Open Command Prompt as administrator:
DISM /Online /Cleanup-Image /RestoreHealthDISM downloads replacement files from Windows Update to repair the component store. This takes 15–30 minutes. When complete, run:
sfc /scannowSFC repairs individual system files using the now-repaired component store. After both complete, restart your PC and retry the failing update.
Step 4 — Check disk space on the C: drive
A recurring failure with no error code often indicates the same disk space shortage occurring on every attempt.
- Open File Explorer → right-click drive C: → Properties
- Check Free space:
- Cumulative updates: need 3–5 GB free
- Feature updates / version upgrades: need 10–20 GB free
If space is insufficient, run Disk Cleanup:
- Search Disk Cleanup in Start and open it
- Select drive C: and click OK
- Click Clean up system files (administrator required)
- Check Windows Update Cleanup and Temporary files
- Click OK → Delete Files
After freeing space, retry the failing update.
Step 5 — Temporarily disable antivirus real-time protection and retry
Some antivirus products interfere with Windows Update file writes on every attempt — creating a persistent loop where the update always fails at the same point.
- Open your antivirus application
- Locate the real-time protection or shields toggle and disable it temporarily
- Go to Settings → Windows Update → Check for updates and attempt the update
- If the update installs successfully, re-enable antivirus protection immediately
- Add
C:\Windows\SoftwareDistributionto your antivirus exclusion list to prevent future interference
If the update still fails with antivirus disabled, antivirus is not the cause — re-enable it and consult the error code in Update history.
How to verify the fix
- Go to Settings → Windows Update → Update history
- Confirm the previously failing update now shows Successfully installed with today’s date
- Check that no new failure entries appear for the same KB number over the next few days
If updates continue failing after completing all five steps, consult the Windows 11 Upgrade Errors hub for error-code-specific guides.