
A Canon printer loses its Wi-Fi connection when the network changes — such as after a router replacement, a Wi-Fi password update, or a network reset. The printer’s Wi-Fi lamp blinks or turns off, and the printer becomes unavailable in Windows.
According to Canon’s official wireless troubleshooting documentation, the printer stores the previous network credentials and must be reconfigured when the network details change. The most common fix is using the Canon Wi-Fi Connection Assistant utility to re-enter the credentials.
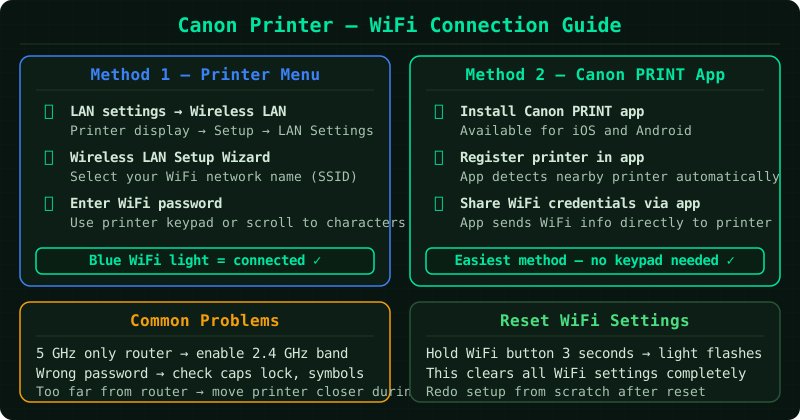
What causes Canon printer Wi-Fi connection failures
Canon printers store the Wi-Fi network name and password internally. Connection failures occur when:
- Wi-Fi password was changed — the printer still uses the old password
- Router was replaced or reset — even the same SSID may have a different configuration
- 5 GHz band only — Canon consumer PIXMA and MAXIFY models support only 2.4 GHz
- WPA3 or mixed security — some Canon models cannot connect to WPA3-secured networks
- IP address conflict — another device on the network is using the printer’s previous IP
How to fix Canon printer not connecting to Wi-Fi
Step 1 — Restart the printer and router
Many temporary wireless connection errors clear after a full restart of both devices. Canon’s official support documentation lists this as the mandatory first step.
- Press the Power button to turn off the Canon printer
- Unplug the router’s power cable from the wall outlet
- Wait 60 seconds
- Plug the router back in — wait for the internet indicator light to become stable
- Turn on the Canon printer and wait for it to complete startup
Check the Wi-Fi lamp on the printer after startup. A solid lamp indicates a successful connection. If the lamp is blinking, the printer is attempting to connect and failing — proceed to Step 2.
Step 2 — Run Canon Wi-Fi Connection Assistant
Canon Wi-Fi Connection Assistant is the official tool for setting up and troubleshooting wireless connections on Canon PIXMA and MAXIFY printers.
- Go to support.usa.canon.com and search for your Canon printer model
- Download Wi-Fi Connection Assistant from the software section
- Run the downloaded file on your Windows PC
- The tool scans for the Canon printer and guides you through selecting your Wi-Fi network and entering the password
- After the setup completes, the tool confirms the connection status
Wi-Fi Connection Assistant handles 2.4 GHz/5 GHz detection automatically and configures the correct settings for your network.
Step 3 — Use WPS push-button connection
If your router has a WPS (Wi-Fi Protected Setup) button, you can connect the printer without entering a password — useful when the password is unknown or the printer’s touchscreen is limited.
- Press the WPS button on your router and hold it for 2–3 seconds
- Within 2 minutes, press and hold the Wi-Fi button on the Canon printer for 3 seconds
- The printer’s Wi-Fi lamp flashes rapidly while connecting
- When the lamp becomes solid, the connection is established
Not all Canon models support WPS — check your printer’s manual or the control panel menu for a WPS option.
Step 4 — Reset printer network settings
If the previous steps fail, the printer’s stored network profile may be causing conflicts. A network reset clears all Wi-Fi credentials and returns the wireless adapter to factory defaults.
On Canon PIXMA models with a touchscreen:
- Tap Setup → Device Settings → LAN Settings
- Select Wi-Fi → Wi-Fi Setup → Other Connection Types
- Select Reset LAN Settings
On Canon models with buttons only:
- Hold the Stop button until the printer makes a sound or the lamp flashes
- Refer to the printer’s quick start guide for the exact button sequence for your model
After the reset, run Wi-Fi Connection Assistant again to reconnect.
Step 5 — Check router band and security settings
Wi-Fi band: Canon PIXMA and MAXIFY consumer models support only 2.4 GHz.
- Log into your router’s admin page (typically
192.168.1.1or192.168.0.1) - Go to Wireless Settings
- Confirm the 2.4 GHz band is enabled and broadcasting
- If both bands share one SSID, split them so the printer can connect specifically to 2.4 GHz
Security type: Set the 2.4 GHz network security to WPA2-Personal (AES). Mixed WPA/WPA2 modes or WPA3 can prevent some Canon models from completing the connection handshake.
How to verify the fix
- On the printer’s control panel, navigate to LAN Settings → Confirm LAN Settings or print the LAN Settings Information page from the Maintenance menu
- Confirm the page shows your correct SSID, Connection: Active, and an assigned IP address
- On Windows, go to Settings → Bluetooth & devices → Printers & scanners and confirm the Canon printer shows Ready
- Send a test print
Frequently asked questions
Canon printer connects to Wi-Fi but is still offline in Windows. After reconnecting, the printer may have a new IP address that Windows has not updated. Open Printer Properties → Ports tab. The listed IP should match the IP shown on the printer’s LAN Settings page. If they differ, update the port IP or delete and re-add the printer in Windows.
Canon printer drops Wi-Fi connection repeatedly. A printer that disconnects regularly usually has a weak signal or receives a dynamic IP that changes with each connection. Move the printer closer to the router, or log into your router and set a DHCP reservation to give the printer a permanent IP address based on its MAC address (shown on the LAN Settings information page).
Canon PIXMA won’t connect after Windows 11 upgrade. Windows 11 changes certain network settings that can affect printer detection. After upgrading, reinstall the Canon driver from canon’s support site and rerun Wi-Fi Connection Assistant to re-register the printer on the new Windows installation.