
An HP printer that shows a solid Wi-Fi connection on its own screen but appears Offline in Windows has a communication mismatch — the printer is genuinely connected to the network, but Windows is trying to reach it at a different IP address than the one it currently holds.
According to HP’s official support documentation, this specific scenario — connected to Wi-Fi but offline in Windows — almost always results from an IP address change. The printer received a new IP from the router after a restart, but Windows still points to the old address.
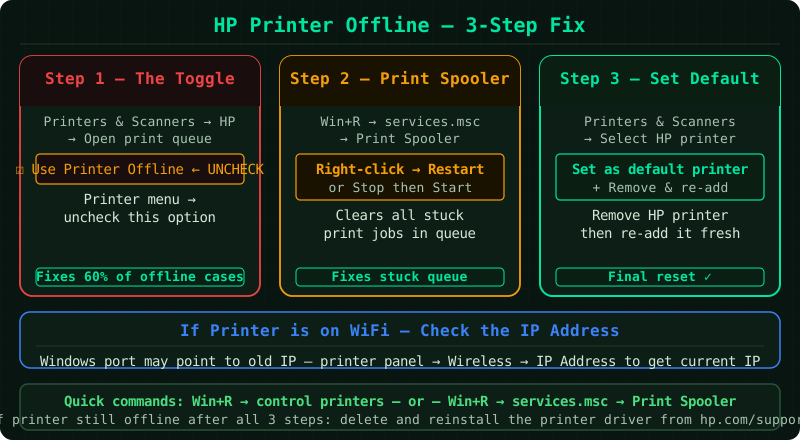
Why HP printer shows connected but offline in Windows
The printer’s Wi-Fi status and the Windows printer status are separate systems:
- The printer’s Wi-Fi lamp and control panel show that the printer is connected to the router — this is accurate
- Windows keeps a port pointing to the printer’s IP address — if the IP changed, Windows cannot find the printer at the stored address
- The result: the printer is connected to the network, but Windows cannot reach it → Offline
This happens most often after:
- A router restart (routers often reassign IP addresses after restarting)
- A printer power-off (the printer may receive a new IP from the router when it reconnects)
- A router replacement or firmware update
How to fix HP printer connected to Wi-Fi but offline
Step 1 — Find the printer’s current IP address
Before fixing the Windows configuration, you need to know the IP address the printer currently holds.
Method 1 — Print the Wireless Network Test Report:
- On the HP printer’s control panel, navigate to Settings → Reports → Wireless Network Test Report
- Print the report
- Find the IP Address line — it looks like
192.168.1.x
Method 2 — Check the Network menu directly:
- On the control panel, go to Settings → Network → Wireless → View Wireless Details
- The current IP address is displayed on screen
Note this IP address — you will use it in the next step.
Step 2 — Update the printer port in Windows
Windows points to the printer using a port that contains the stored IP address. If the printer’s IP changed, the port needs to be updated.
- Go to Settings → Bluetooth & devices → Printers & scanners
- Click your HP printer
- Click Printer properties
- Select the Ports tab
- Find the checked (active) port — it should show an IP address like
IP_192.168.1.x - Click Configure Port
- Update the Printer Name or IP Address field to match the current IP from Step 1
- Click OK and close Printer Properties
Try printing a test page immediately after this change. In most cases, this resolves the offline status without any further steps.
Step 3 — Delete and re-add the printer
If updating the port does not restore the connection, removing and re-adding the printer forces Windows to rediscover the printer at its current IP address.
- Go to Settings → Bluetooth & devices → Printers & scanners
- Click your HP printer
- Click Remove device and confirm
Re-add the printer:
- On the same Printers & scanners page, click Add a printer or scanner
- Windows searches the network — wait for your HP printer to appear in the list
- Click it and select Add device
- Windows installs the driver and creates a port with the current IP address
If Windows does not find the printer automatically, click The printer I want isn’t listed and enter the IP address from Step 1 to add it manually.
Step 4 — Assign a static IP address
If the HP printer repeatedly goes offline after restarts because its IP keeps changing, configure a DHCP reservation in the router. This assigns the same IP to the printer every time it connects.
- Log into your router’s admin page (usually
192.168.1.1or192.168.0.1) - Go to DHCP Settings → DHCP Reservations (also called Static DHCP or IP/MAC Binding)
- Add a new reservation:
- MAC address: found on the Wireless Network Test Report (format:
A1:B2:C3:D4:E5:F6) - IP address: choose an IP in your network range outside the DHCP pool (for example
192.168.1.200)
- MAC address: found on the Wireless Network Test Report (format:
- Save the reservation
- Restart the printer — it will receive the reserved IP address going forward
After setting the reservation, update the Windows port (Step 2) to point to the new static IP if it differs from the current one.
Step 5 — Run HP Print and Scan Doctor
HP Print and Scan Doctor automates the port detection and update process — it identifies the printer’s current IP and updates the Windows port automatically.
- Download HP Print and Scan Doctor from support.hp.com
- Run the tool and click Start
- Select your HP printer (it appears in the list even when showing Offline in Windows, because the tool scans by device rather than port)
- Select Fix Printing
- Allow the tool to complete — it updates the port and confirms the connection
How to verify the fix
- In Settings → Bluetooth & devices → Printers & scanners, confirm the HP printer shows Ready (not Offline)
- Right-click the printer (in Devices and Printers) and select Print test page
- Confirm the test page prints within 30 seconds
Frequently asked questions
HP printer goes offline again after every restart. Each restart gives the printer a new IP, and Windows loses track of it. The permanent fix is a DHCP reservation in your router (Step 4). Once the printer always gets the same IP, the offline issue stops occurring.
HP Smart app shows the printer connected but Windows shows offline. HP Smart communicates with the printer through the cloud service and may show it as connected even when the local Windows port is misconfigured. The Windows printer status reflects the local port configuration — follow Steps 1–3 to update it.
HP printer connected to Wi-Fi but won’t print from one specific application. If the printer prints from some applications but not others, the issue is not the port — it is likely a driver compatibility issue with that application. Try printing to PDF first, then printing the PDF from Adobe Reader to isolate the problem.